In the current home improvement market, acoustic wall panels, as a wall panel product that combines acoustic properties with aesthetics, is easy to install and cut, and is widely welcomed by young people, especially DIY enthusiasts. What are the specific installation steps of acoustic panels? What are the precautions? After reading this article, even if you have never had DIY experience, you can also install akupanels in your home.

Notice of Acoustic Panels Installation
1. The wall must be level to within 3mm in a 1m span or otherwise appropriate ratios of this requirement. If the wall surface is not flat enough, install timber frames or use cement to fill and level it as needed.
2. The wall surface should be dry, free of impurities, delamination, voids, and other defects.The moisture content of the wall should not be higher than 8%.
3. The wooden acoustic panels should only be installed in temperature-controlled environments. It is necessary to maintain a constant temperature before, during, and after the installation. The ideal indoor temperature is 60~77°F(15~25℃) .
Preparation of Acoustic Panels Installation
1. Acclimation. The acoustic slat walls should be placed on the construction site for 24 hours before installation begins, in order to allow the wall panels to adapt to the site temperature.
2. Measuring. Measure the width and height of each wall at the installation area. Determine the size of the wall panels. Measure cut-out locations for plumbing fixtures and switches, mark them on the back of the appropriate panel(s).
3. Planning. Most installations will need approximately a 10% cutting allowance added to the square meter of the room.
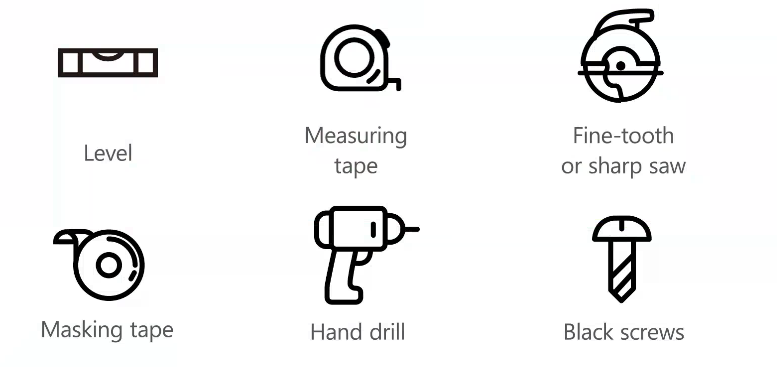
Installation Tools

Installation of Acoustic Panels
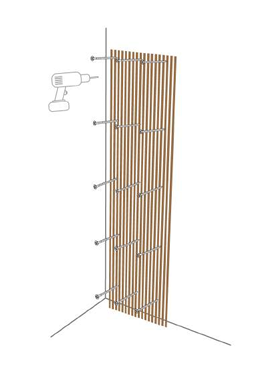
1. Screwing directly into the wall
We recommend matching the screws to the felt colour. Using black screws for the black backing option or silver or grey screws for the grey backing, the acoustic wood wall panels can be screwed directly into the wall through the acoustic felt.
We recommend approximately 15 screws (35mm) per panel at 3.5" intervals across the width and 24”intervals down the length of the panel.
If installing into ceilings, make sure they are screwed into ceiling joists. Please make sure the correct fixings are used if going into the plasterboard, for example.

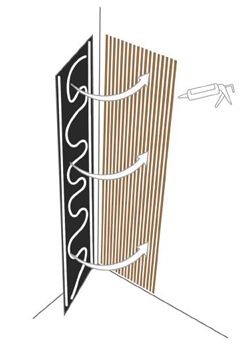
2. Gluing straight onto the wall
Apply adhesive glue to the back of the wallboard and stick it to the wall.We recommended to start with the middle,then at the top, at the base, then as needed to keep the panel flat.

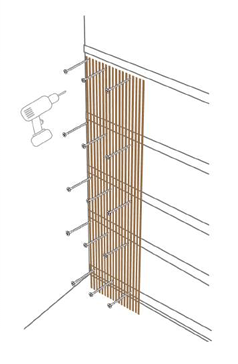
3. Screwing the panels into 45mm timber battens
We recommend screwing 45mm timber battens to the wall and then screwing the sound dampening panels directly into the batons through the acoustic felt to achieve optimum sound absorption.
Combined with PET felt behind the panels between the battens, this will achieve Class A sound absorption.

Maintenance of Acoustic Panels
sound isolation walls can be used as soon as the silicone and adhesive has had 24 hours to reach an adequate level of cure. Complete curing takes approx 7 days. Do not hang heavy objects on the panels
directly – drill them to the wall for proper support. Use a mild cleaning agent with cloth towel to clean the wall panels– do not use abrasive cleaning products as they may cause damage.
After watching the installation process of the acoustic wood panels, do you have a more intuitive understanding of its "easy installation" feature? This convenience gives it strong market competitiveness. As a high-end manufacturer of new building materials, DECNO has always insisted on putting customers first, keeping up with the market and leading industry innovation for 28 years. In addition to conventional wood slatted wall panels, we also provide art series wall panels with different shapes, giving customers a broader creative space. Contact us for more details and quotes, and start a new round of cooperation!